

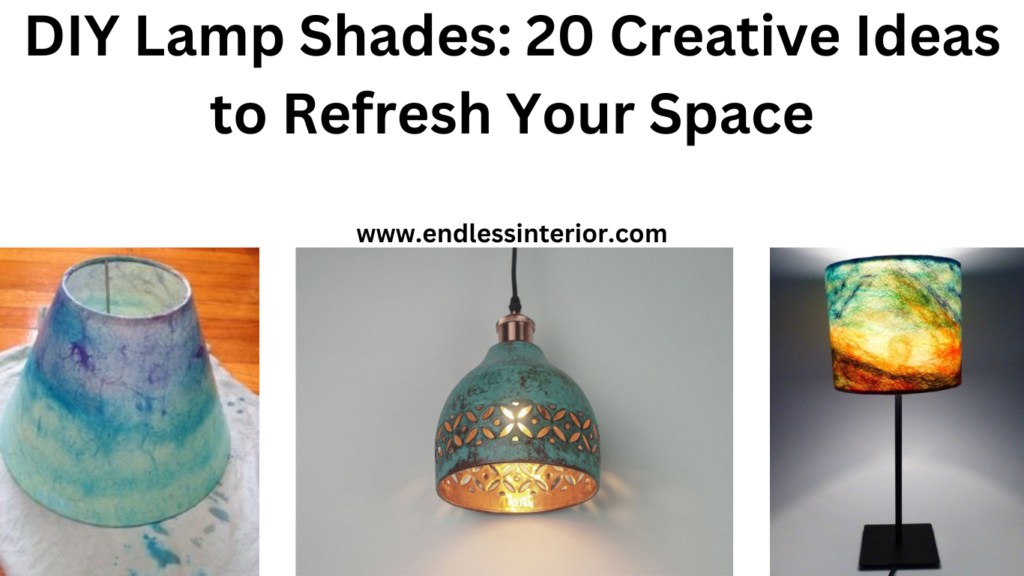
Our collection of innovative lamp shades ideas offers a fresh twist for every décor style. Transform your lamp effortlessly with these simple yet creative updates. Whether you prefer a modern, rustic, or artistic touch, these unique tweaks will give your lamp shades a whole new look.
Enhance the look of ordinary lamp shades with quick and stylish add-ons that take less than an hour. Your lamp isn’t just for lighting—it plays a key role in home décor, setting the mood and elevating the ambiance of your living space effortlessly.
Which Lampshade Works for Me?
Selecting the perfect lamp shades is essential for a cohesive look that complements your room’s colors and future design changes. If you’re switching to smart lighting or eco-friendly décor, consider sustainable options like bamboo lamp shades. Proportions matter, too—oversized shades can overwhelm small spaces. For a quick refresh, explore DIY lamp shades that add personality and style effortlessly.
1. Painted Lampshade
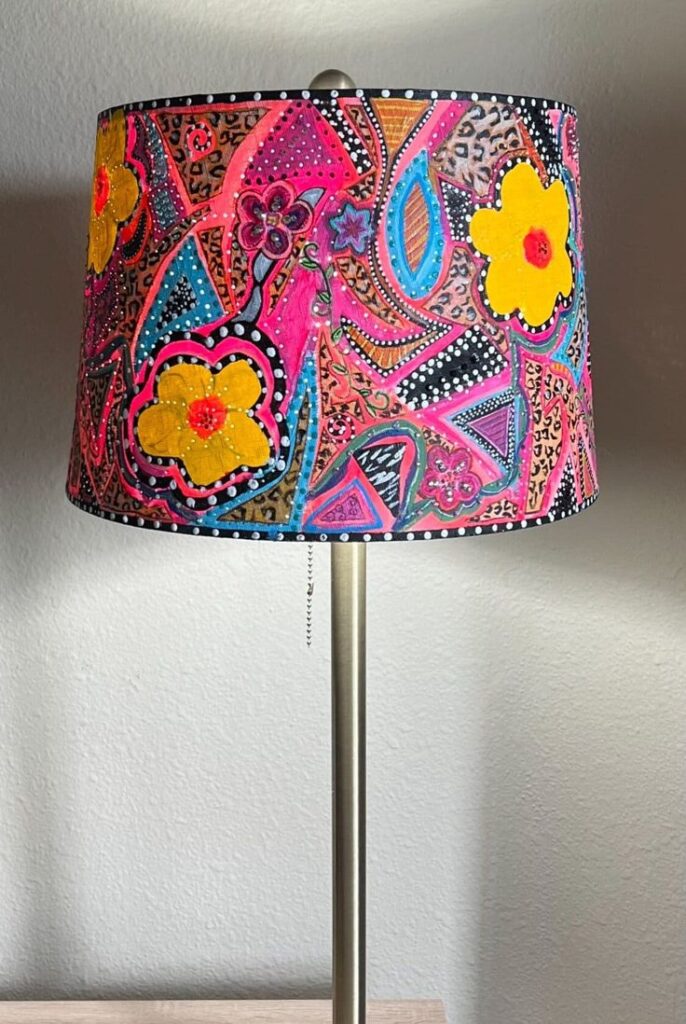
Stylist and muralist Liz Kamarul transformed an ordinary lamp into a stunning work of art using leftover interior house paint from various home projects. To create her beautifully designed lamp shades, she first sketched her pattern lightly with a pencil. Then, with a steady hand, she applied thin, even coats of paint using a 2-inch angled brush, allowing each layer to dry before adding the next. Her secret to achieving crisp, clean lines was patience and precision. “I didn’t use any tape for this design; I just went nice and slow, taking my time with the paintbrush to get a crisp, straight line,” she shares.
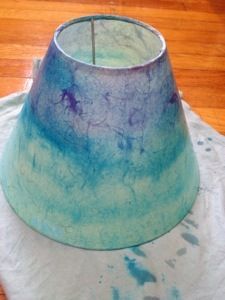
2. Dip-Dye Lampshade
Rachel Mae Smith of The Crafted Life used two shades of RIT All-Purpose Dye to create a stunning dip-dye effect on her lamp shade. She carefully followed these steps to achieve the perfect gradient:
- Prepare the Dye Bath: Fill a tub partially with hot water and dip the lamp shades in to test the water level.
- Mix the Dye: Add the dye to the water, stirring gently to ensure even color distribution.
- Test the Shade: Dip a strip of paper towel into the dye bath to check the color and adjust as needed.
- Dye the Lamp Shade: Submerge the lamp shades in the dye for 10-15 minutes to allow the color to develop.
- Repeat for the Second Color: Drain the water, flip the lamp shades, and repeat the process with a second color, ensuring the dyes slightly overlap for a smooth transition.
- Drying Process: Let the lamp shades dry completely for 24 hours before use.
This method results in a beautifully customized lamp with a soft, elegant dip-dye finish.
3. Pleated Fabric Lampshade
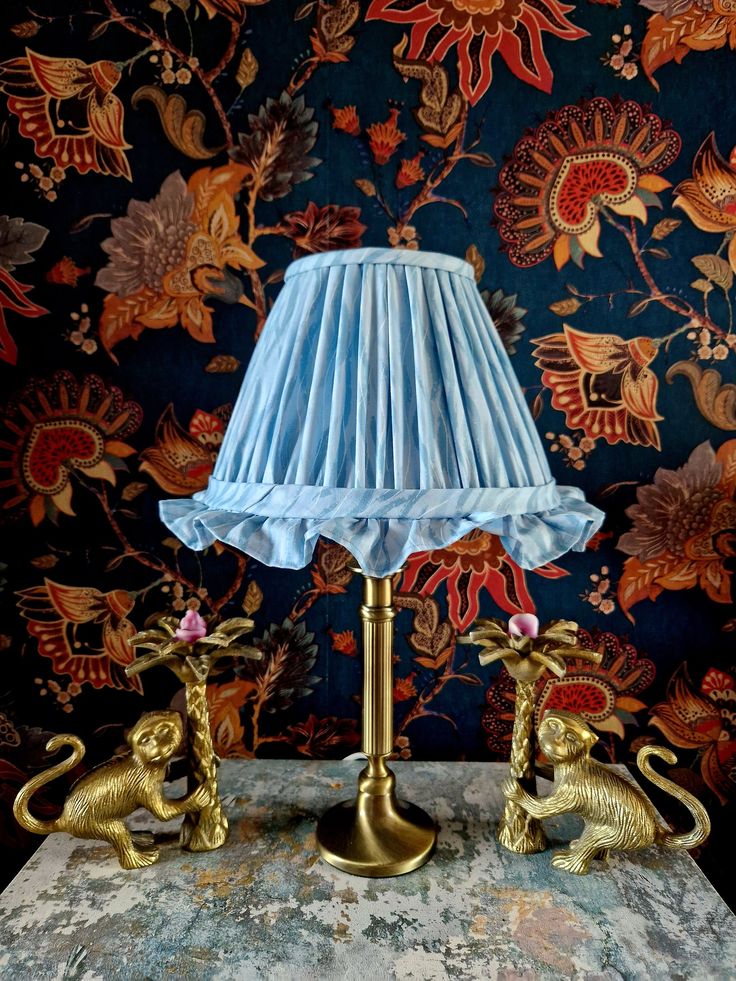
Interior designer Beth Diana Smith transformed a plain lamp shades by covering it with a pleated piece of vibrant African wax print fabric she already owned. To ensure a perfect fit, she carefully measured the circumference of both the top and bottom of the lamp shade, adding an extra inch for seams.
She then ironed and secured these seams using fabric glue for a polished finish. Since the top circumference of the shade was 8 inches smaller than the bottom, Smith meticulously created eight 1-inch pleats, using binder clips to hold them in place while working. After forming the pleats, she pressed them with an iron and reinforced their structure with small dabs of fabric glue at both the top and bottom. To ensure a smooth and lasting application, she coated the inner side of the fabric with spray glue before firmly securing the pleats, seams, and fringe with additional fabric glue, resulting in a stunning and custom-designed lamp shade.
4. Watercolor Lampshade
Designer Mat Sanders crafted his own watercolor paints using a food coloring-based recipe from Happy Hooligans, aiming to create a unique pattern inspired by nature. He experimented with two shades of green, skillfully muting one by incorporating a touch of coffee for a more earthy tone. The recipe relied on corn starch, requiring thorough stirring to prevent clumps from forming, ensuring a smooth and consistent application. To control the flow of paint and prevent drips, he opted for a natural-bristle brush, keeping it damp but not overly wet.
His artistic vision stemmed from his time spent in Tucson during quarantine, where he found himself captivated by the striking patterns of Saguaro cacti. Their distinctive trunks and sprawling arms sparked an idea—why not translate these organic forms into a design? Sanders envisioned applying this mesmerizing cactus-inspired pattern onto various decorative elements, including lamp shades, bringing a vibrant and artistic touch to interior spaces. His ultimate goal? To recover a sofa in this stunning, nature-inspired design, proving that creativity can transform everyday objects like lamps and furnishings into works of art.
5. Botanical Lampshade

Artist Inslee Fariss brought her creativity to life by transforming a plain lamp shade into a stunning botanical masterpiece using Angelus Leather Paint. She praised the paint for its smooth application, excellent adhesion, and quick drying time, noting that it required no water mixing and had the perfect viscosity for detailed artwork.
Fariss carefully planned her design, incorporating a variety of delicate flowers and small insects while maintaining a cohesive green-and-white color palette to unify the intricate floral elements. For those hesitant to paint freehand, she recommended starting with light pencil sketches of simple plant shapes before applying paint to the lamp shade.
Emphasizing the beauty of artistic spontaneity, Fariss reassured that even small drips or accidental strokes could seamlessly evolve into charming details—whether an extra leaf, a whimsical swirl, or even a tiny bumblebee. With this approach, she encouraged others to embrace creativity, turning an ordinary lamp into an eye-catching, hand-painted work of art.
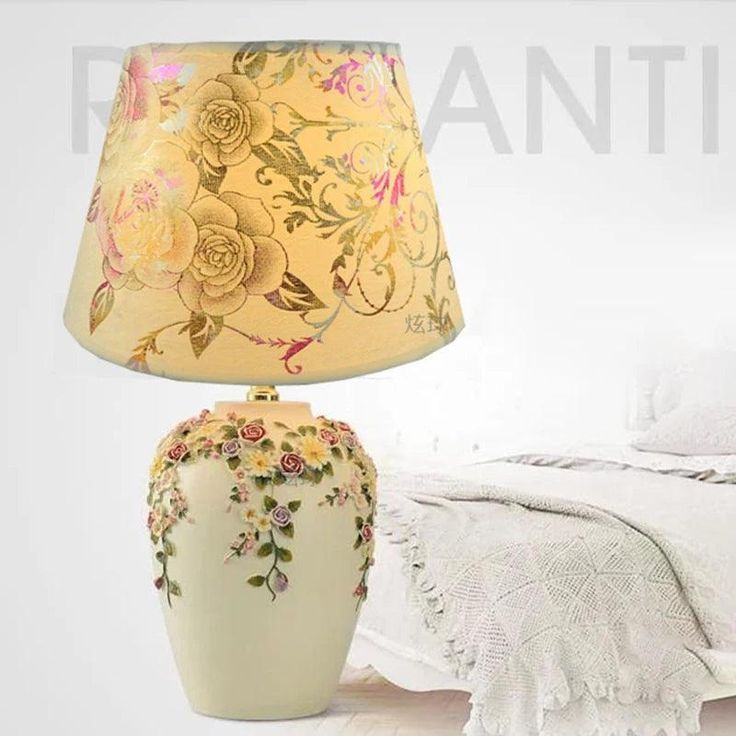
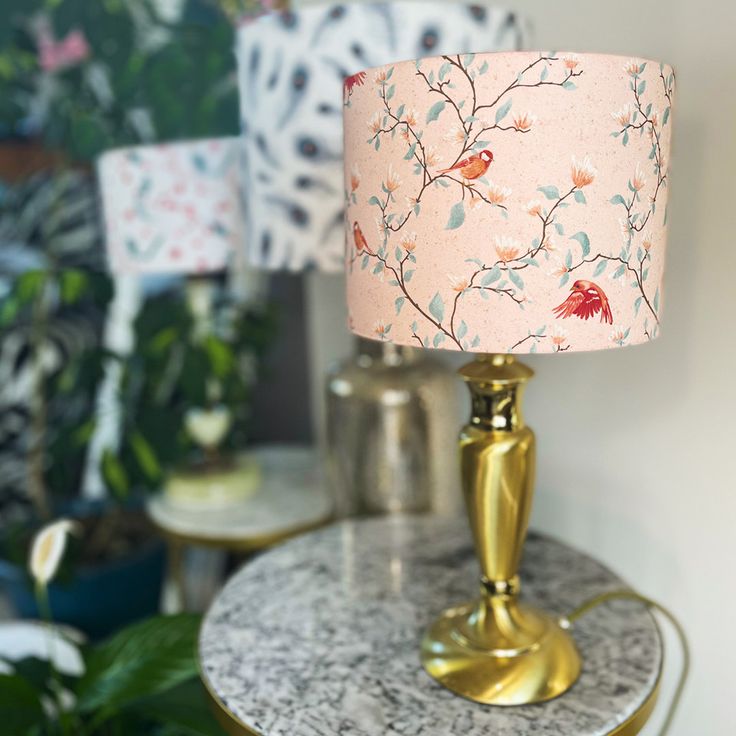
6. DIY Decoupage Design
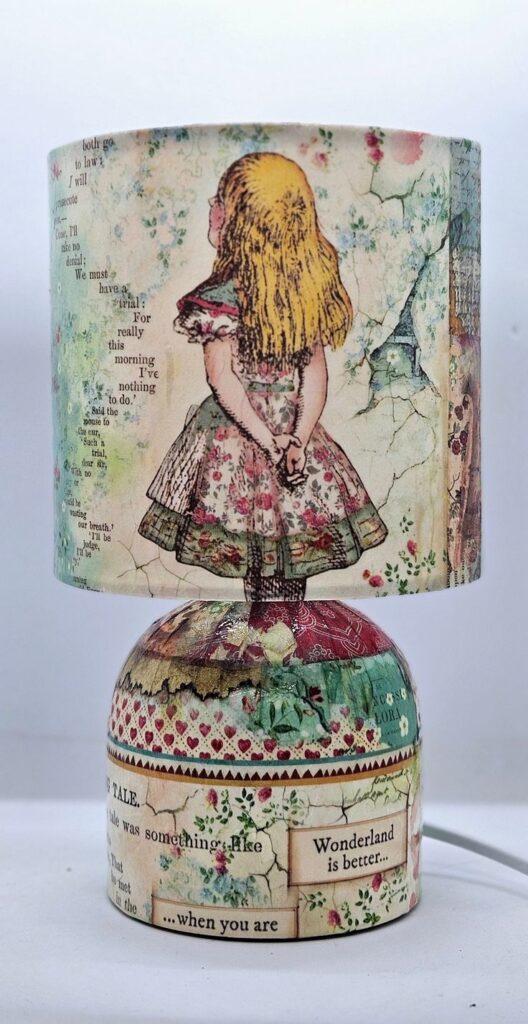
Transform an ordinary lamp shades into a stunning, custom-designed piece using your favorite fabric and the art of decoupage. This eye-catching watercolor-inspired drum shade was crafted by carefully cutting out floral patterns from spare fabric and layering them for a unique, artistic effect.
To achieve a polished and professional look, a decoupage medium was used to adhere the fabric cutouts to the lamp shade, ensuring a smooth and seamless application. Bias tape was then added to refine the edges, enhancing the overall design with a crisp, finished touch.
For those looking to add more depth and creativity, don’t hesitate to mix different patterns or overlap large floral cutouts to create a garden-inspired collage effect. This DIY technique allows for endless customization, turning an ordinary lamp into a striking decorative element that brings charm and personality to any space.
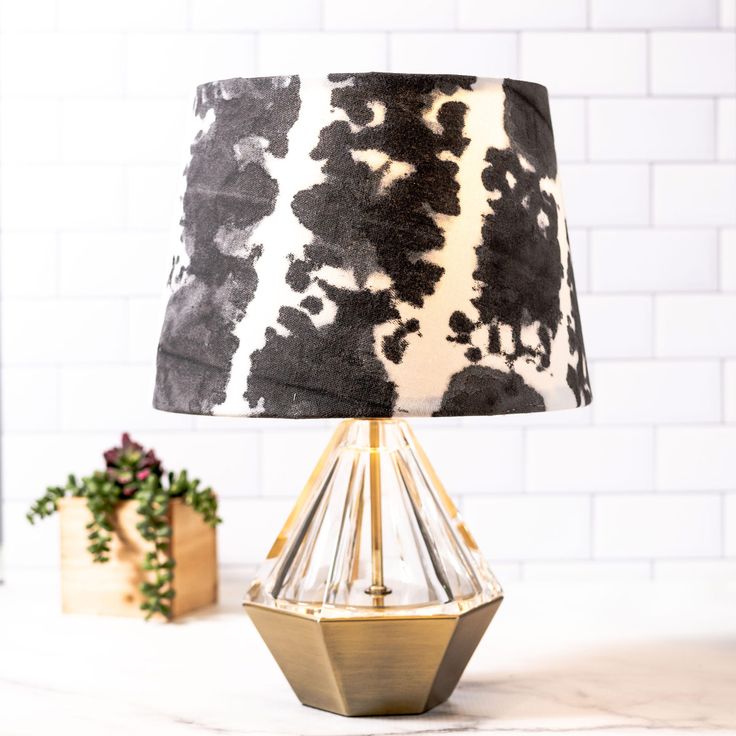
7. Golden Glow
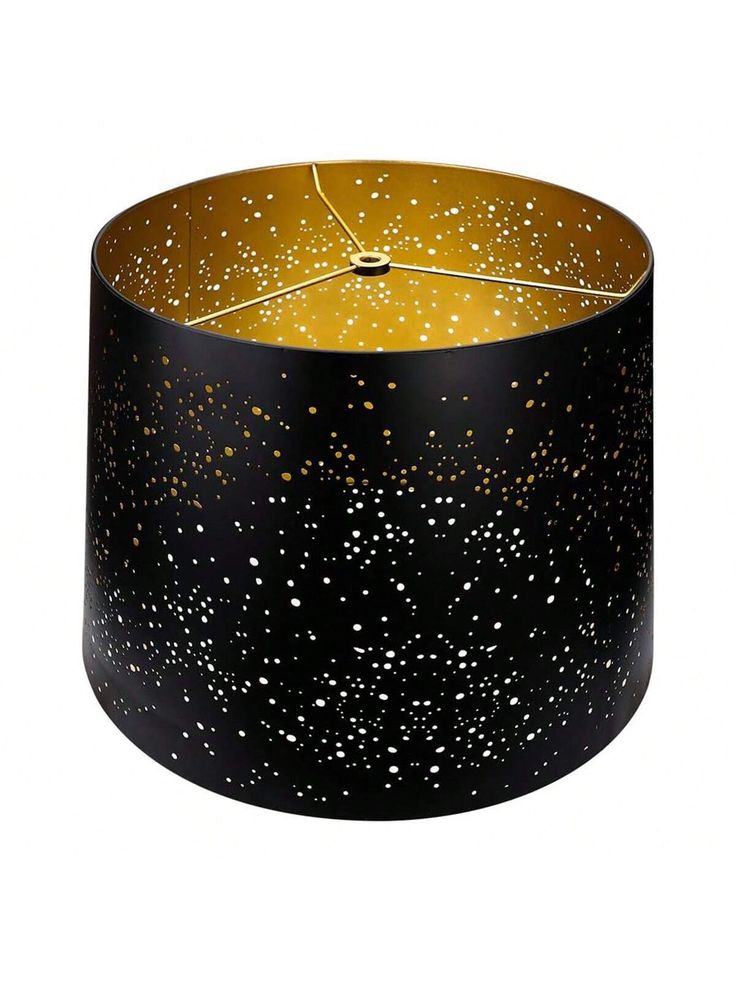
Create a stunning black-and-gold DIY lamp shade with this simple yet elegant technique. Begin with a plain white drum shade as your base. To achieve a sleek, professional look, first cover the top and bottom edges with painter’s tape to protect them from unwanted paint coverage.
Next, carefully spray the interior of the lamp shade with two even coats of gold spray paint, allowing each layer to dry thoroughly for a rich, metallic sheen. Once the gold finish is completely set, remove the painter’s tape and move on to the exterior. Apply multiple coats of black fabric paint to the outside of the lamp shade, ensuring smooth, even coverage for a bold, sophisticated contrast.
After the paint has fully dried, pair this glamorous lamp shade with a contemporary lamp base, such as an industrial bubble design, for a modern, stylish aesthetic. This DIY project transforms an ordinary lamp into a striking décor statement, adding depth, elegance, and personality to any space.
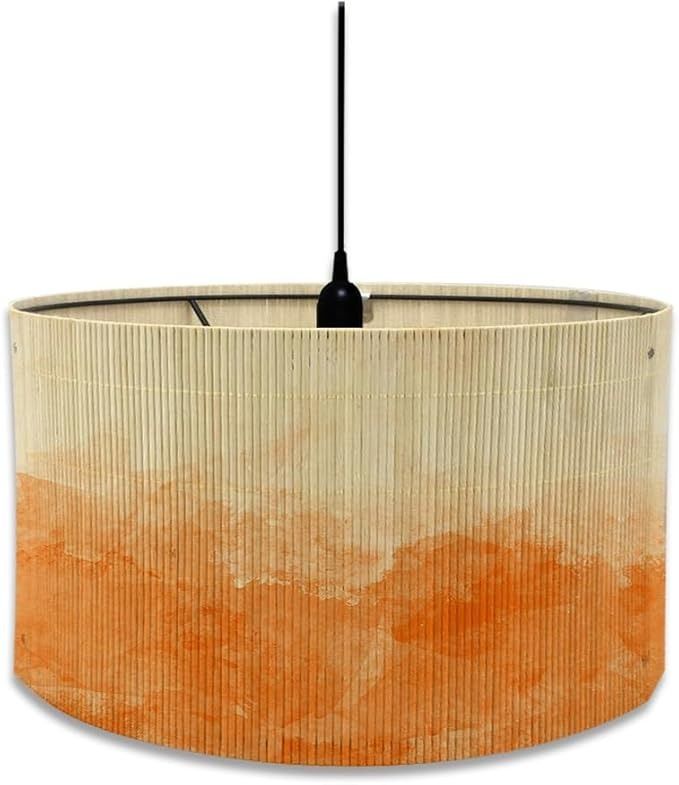
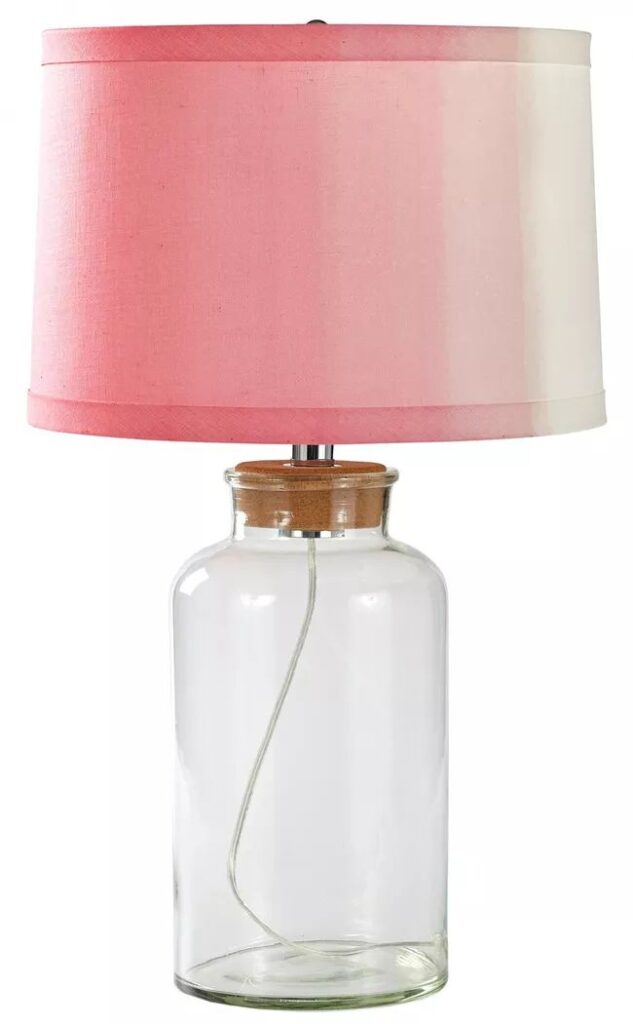
8. Ombre Effect
Ombre designs continue to be a stylish trend, making them a perfect choice for a DIY lamp shades makeover. This creative project transforms ordinary lamp shades into a stunning gradient masterpiece by blending paint colors from light to dark for a seamless transition.
To achieve this effect, begin by selecting a range of paint shades that gradually shift in intensity. As you apply the colors from the top of the lamp shades downward, use a damp foam brush to blend them smoothly, creating a soft, flowing ombre effect. Work quickly, as the paint dries fast and becomes harder to blend once set.
This DIY lamp shade technique adds a modern and artistic touch to any space, elevating the overall aesthetic of your lamp. Whether placed in a bedroom, living room, or office, an ombre lamp shade brings a stylish, contemporary vibe that enhances your décor effortlessly.
9. Coastal Charm
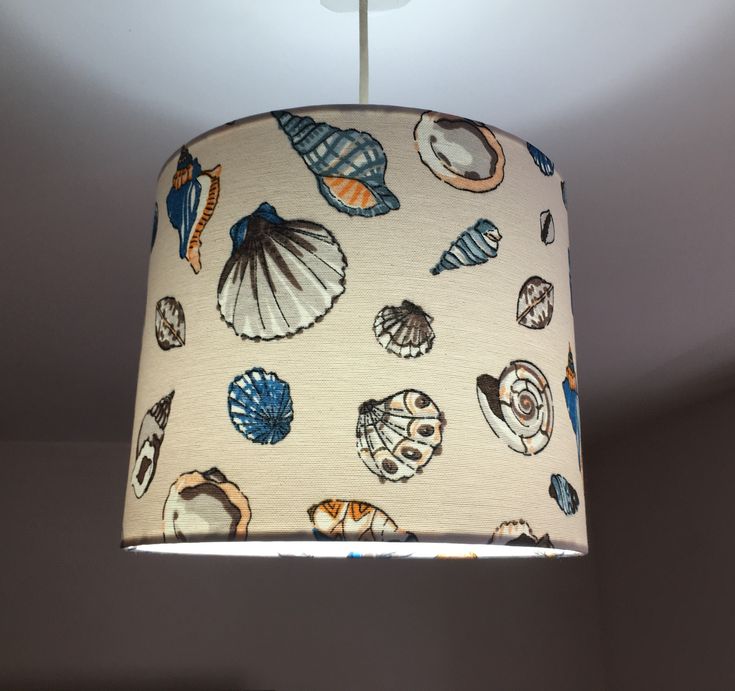
Give a plain white lamp shades a stylish upgrade by adding a pop of color and pattern to its interior. This DIY lamp shades makeover transforms an ordinary piece into a vibrant decorative accent by lining the inside with fun, bright wallpaper.
To achieve this look, start by measuring the interior of the lamp shades and cutting the wallpaper slightly larger than needed. This extra margin allows for precise trimming later, ensuring a perfect fit. Once cut, carefully insert the wallpaper inside the lamp shade, smoothing it out to eliminate any wrinkles or bubbles.
Secure the wallpaper at the seams using Mod Podge or a strong adhesive, making sure it adheres evenly for a polished finish. This simple yet effective technique adds an unexpected design element, making the lamp shades a stunning focal point while casting a soft glow that enhances any room’s ambiance.
Also Read-
- Moon Lamp Decor: 10 Creative Ways to Light Up Any Space
- 10 Best Candle Warmer Lamps for a Cozy, Inviting Home
- 8 Best Study Lamps for Perfect Lighting and Focused Study Sessions
- 2025’s Best Mushroom Lamps to Transform Your Home Decor
10. Rope-Wrapped Lampshade
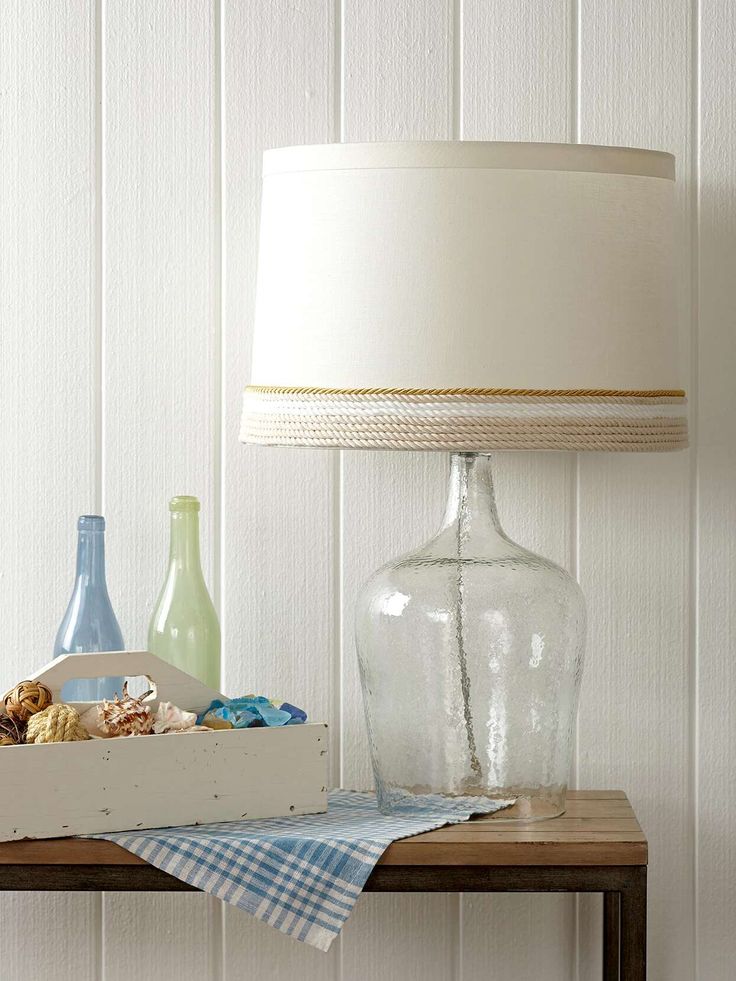
Give a linen-covered lamp shades a stylish nautical-inspired makeover by adding decorative details to its bottom edge. This DIY lamp shades upgrade brings texture and charm by wrapping a .28-inch-diameter cord around the base, securing it with hot glue for a seamless finish.
To achieve a striking, layered effect, alternate between different colors such as cream, white, and gold, switching shades after a few passes. This simple yet elegant technique transforms an ordinary lamp shades into a sophisticated decorative piece that adds coastal flair to any space.
Not only does this DIY lamp shades design elevate the look of your lamp, but it also introduces a handcrafted, textured element that pairs beautifully with nautical or rustic décor styles. Whether placed in a beach house, bedroom, or living space, this revamped lamp shades is sure to make a statement.
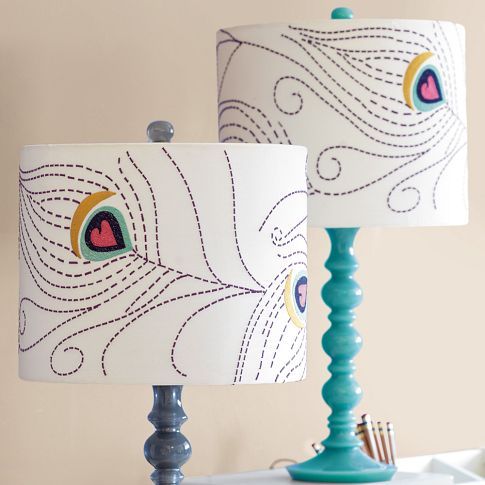
11. Thread and Needle Shade
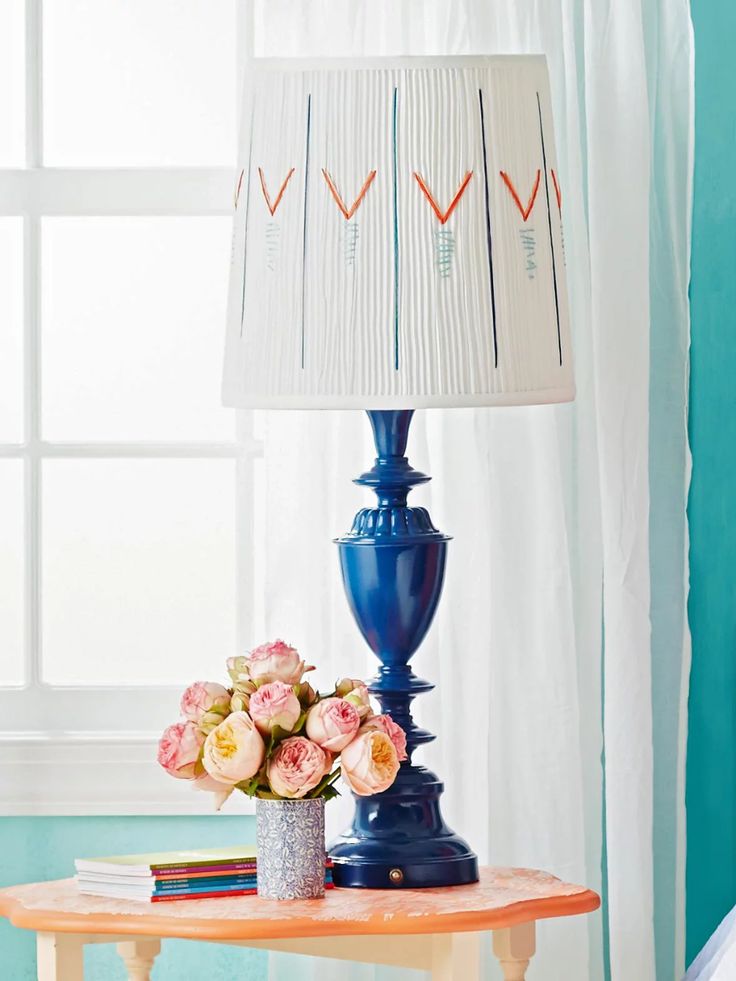
Embroidery floss isn’t just for friendship bracelets—it’s a creative way to enhance everyday décor, including lamp shades. Give plain lamp shades a trendy makeover by stitching eye-catching geometric patterns with colorful embroidery floss, using a needle to weave intricate designs.
To keep the look polished, ensure all tied ends remain hidden on the inside of the lamp shade for a seamless finish. The vibrant contrast of embroidery floss against the white fabric creates a bold visual effect, instantly elevating the lamp shade’s design.
Pair this beautifully detailed lamp shade with a freshly painted lamp base to enhance its overall aesthetic, making it a striking focal point in any room. Whether adding a pop of color to a minimalist space or complementing an eclectic décor style, this DIY lamp shades project brings creativity and personality into your home.
12. Fabric-Covered Lampshade
Give your lamp shades a fresh new look by wrapping them in your favorite fabric, creating a seamless and stylish update. This simple DIY project allows you to transform a plain lamp shades using fabric that compliments your existing décor.
For a cohesive design, consider repurposing extra fabric from curtains, linens, or upholstery already featured in the room. Not only does this approach add a harmonious touch, but it also ensures a polished, custom-made aesthetic. Best of all, no prior sewing skills are required—just roll the fabric around the lamp shade and secure it neatly for a smooth finish.
This easy yet effective method brings warmth, texture, and personality to your lamp, making it a perfect way to refresh your space with minimal effort. Whether you choose a bold pattern or a soft neutral, this fabric-wrapped lamp shade will enhance any room’s ambiance beautifully.
13. Dainty Dots
At first glance, this beautifully textured lamp shade appears to be adorned with intricate embroidered French knots. However, a closer look reveals that these delicate details are actually tiny paint dots, carefully applied using dimensional fabric paint—the same kind often used for decorating t-shirts.
This DIY lamp shades makeover is incredibly simple and requires no special skills, making it a perfect project for beginners and craft enthusiasts alike. To achieve the effect, use fabric paint to create small, raised dots in a pattern of your choice, allowing them to dry fully for a textured, hand-stitched appearance.
The result is a stunning, embroidered-look lamp shade that adds charm and personality to any space. Whether placed on a bedside table, desk, or living room side table, this creative lamp shade design brings warmth and style to your home décor with minimal effort.
14. Fabric Dye Lampshade
Easily transform plain lamp shades into stunning statement pieces with fabric dye, adding vibrant color and depth in just a few simple steps. A dip-dyed effect gives your lamp shade a beautiful gradient, making it a perfect DIY project for any skill level.
Start by mixing powdered fabric dye in a large container, ensuring the color is well dissolved. Dip the entire lamp shade into the dye, leaving a few inches at the top untouched. Hold it submerged for three to four minutes before lifting it slightly, allowing the lower portion to remain in the dye for a deeper hue.
Repeat this process gradually, dipping and holding to create a layered ombre effect that transitions smoothly from light to dark. Once satisfied with the intensity, let the lamp shade dry completely before using it. This dip-dyed technique adds an artistic touch to your lamp, making it a stylish addition to any space.
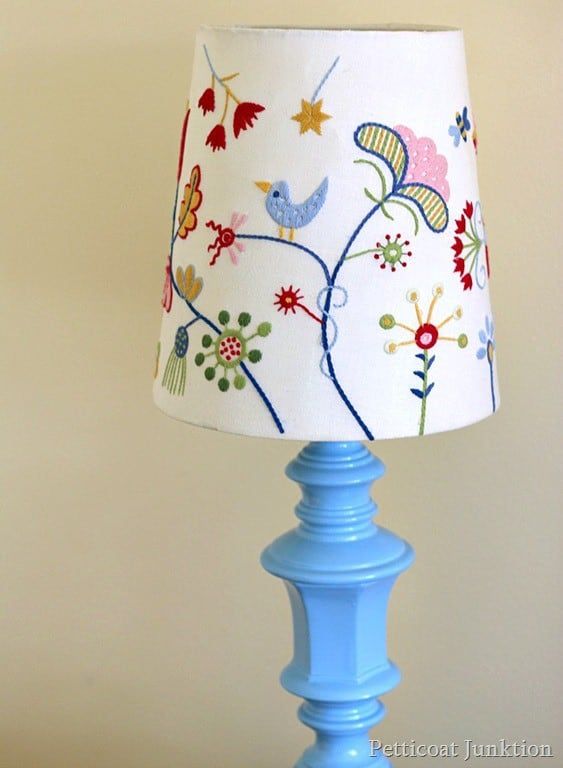
15. Cardstock Design
Bring a touch of nature indoors by transforming a plain lampshade into a stunning floral-inspired masterpiece. This DIY lampshade project adds a whimsical, garden-fresh charm with delicate paper flowers and hand-drawn stems, creating a unique decorative accent for any space.
Start by punching out 1-inch and 1½-inch scalloped circles from pastel-colored cardstock in various soft hues. Using a paint pen, carefully draw wavy stems and branches across the surface of the lamp shade, ensuring a natural, flowing design. For a polished look, attach the punched paper flowers to the ends of the branches with hot glue, creating a beautiful blooming effect.
If drawing freehand feels daunting, simply tape a pattern inside the lamp shade to use as a tracing guide. This simple yet elegant DIY lampshade makeover brings warmth, texture, and a nature-inspired aesthetic, making it a perfect addition to a cozy reading nook or a stylish bedroom retreat.
16. Recycled Fabric Lampshade
Repurpose an old dress into a stylish, one-of-a-kind lamp shade cover, giving it a fresh new life with this creative DIY project. Transforming fabric into a unique lamp shade design adds a personalized, vintage-inspired touch to your home décor effortlessly.
Begin by wrapping the dress’s hem securely around the bottom edge of the lamp shade, using hot glue to keep it in place. Gradually work the remaining fabric over the shade, gently scrunching and gathering it to create soft, elegant folds that enhance the texture and dimension of the lamp shade.
Once you’ve achieved the desired draped effect, trim the fabric about an inch above the top edge of the lamp shade. Carefully tuck and hot-glue the cut edge inside the shade for a clean, seamless finish. This upcycling technique not only breathes new life into old clothing but also turns your lamp shade into a charming statement piece that adds warmth and character to any space.
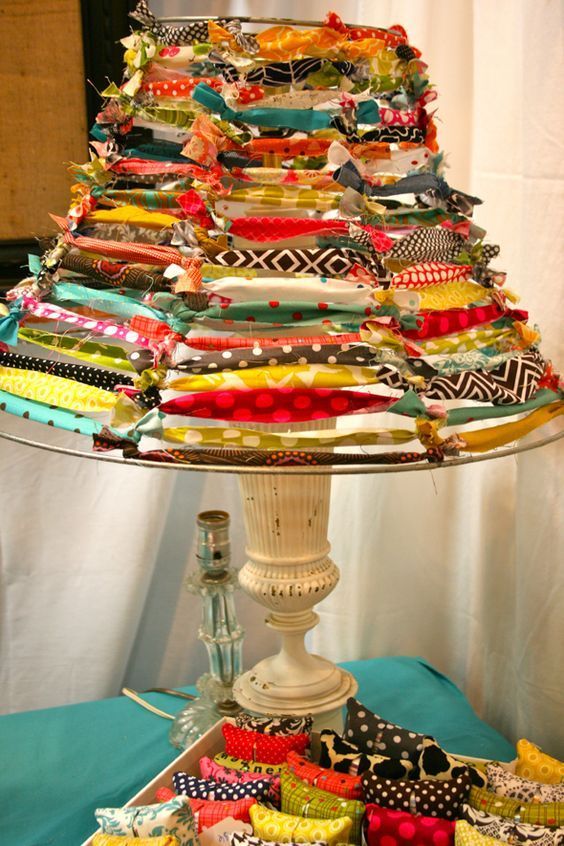
17. Fabric Scrap Shade
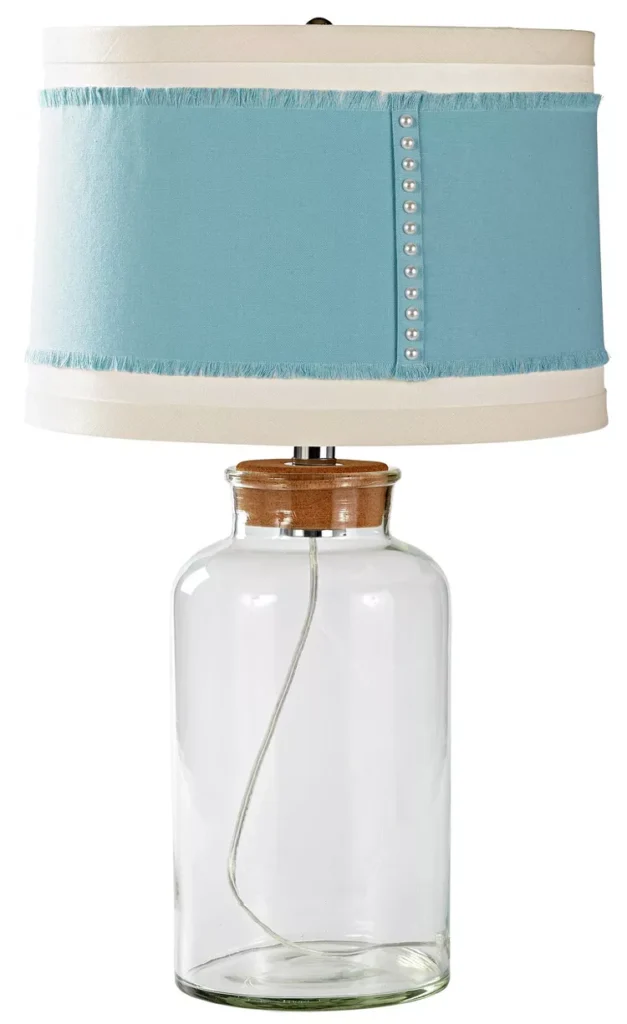
Turn leftover fabric scraps into a stunning, customized lamp shade accent with this simple yet elegant DIY project. Repurposing fabric for lamp shades not only adds a unique touch to your décor but also gives new life to beautiful materials you love.
Start by measuring the height of your lamp shades and subtracting 2 inches to determine the fabric dimensions. Then, measure the circumference 1 inch from both the top and bottom edges, adding 2 extra inches to each for a perfect fit. Cut the fabric to size and gently pull threads along the long edge to create a soft, fringed effect.
Wrap the fabric band around the lamp shade, securing it with hot glue for a seamless fit. To enhance the design, consider adding embellishments like decorative fabric strips with raw edges or adhesive pearls to cover any visible seams. This DIY lamp shades makeover transforms a simple accessory into a stylish statement piece, bringing texture, color, and personality to any room.
18. Spray-Painted Shade
Turn leftover fabric scraps into a stunning, customized lamp shade accent with this simple yet elegant DIY project. Repurposing fabric for lamp shades not only adds a unique touch to your décor but also gives new life to beautiful materials you love.
Start by measuring the height of your lamp shade and subtracting 2 inches to determine the fabric dimensions. Then, measure the circumference 1 inch from both the top and bottom edges, adding 2 extra inches to each for a perfect fit. Cut the fabric to size and gently pull threads along the long edge to create a soft, fringed effect.
Wrap the fabric band around the lamp shade, securing it with hot glue for a seamless fit. To enhance the design, consider adding embellishments like decorative fabric strips with raw edges or adhesive pearls to cover any visible seams. This DIY lamp shades makeover transforms a simple accessory into a stylish statement piece, bringing texture, color, and personality to any room.
19. Felt DIY Lampshade

Give a plain lampshade a vibrant, textural makeover by adding colorful strips of felt. This DIY project transforms ordinary lamp shades into stylish, eye-catching décor, adding warmth and personality to any space with minimal effort.
Start by cutting 2-inch-wide strips of felt, ensuring each strip is 1 inch longer than the height of the lamp shade for proper coverage. Fold each strip in half lengthwise to create a structured, layered effect, then secure them to the lamp shade with hot glue. Allow the strips to extend about ½ inch beyond the top and bottom rims for a playful, dimensional look.
Position the felt strips close together, alternating colors periodically to form a bold, striped pattern. The combination of soft felt texture and contrasting hues gives the lamp shade a striking, modern appearance. This creative and budget-friendly lamp shade makeover is an easy way to add depth, color, and personality to your home décor.
20. Copper Update
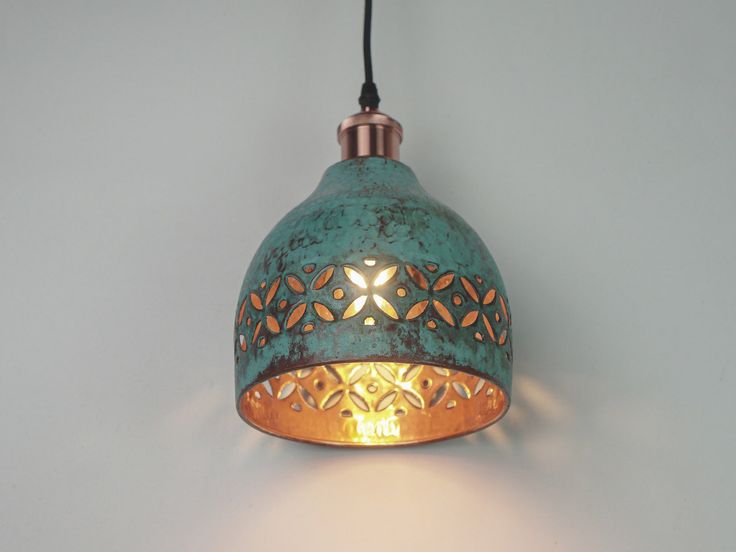
Transform plain lamp shades into stunning, high-end décor with a simple yet luxurious DIY upgrade using copper foil tape. This budget-friendly trick adds a touch of metallic elegance without the need to buy a brand-new lamp shade, instantly enhancing your space with a chic, modern glow.
Applying the foil is effortless—just like placing stickers! Cut and adhere the copper foil tape to your lamp shade, smoothing out any air bubbles or wrinkles with your fingers for a flawless finish. The subtle shimmer of the metallic tape catches the light beautifully, creating an upscale, designer-inspired look.
Though this DIY project requires minimal effort, the impact is striking. Even a small touch of metallic detailing can dramatically elevate the aesthetic of your lamp shades, bringing warmth, sophistication, and contemporary charm to any room.